Saturday 28 September 2013

Macmillan Coffee morning .. but in the afternoon.

Well Thursday was a day dedicated to baking.  Some were old favourites such as the  Victoria sandwich, cherry scones, millionaire shortbread and fruit cake whilst others were new creations for me.  I've made a carrot cake, coffee and walnut cake and a chocolate fudge cake. My kitchen looked like a zone of devastation.  My friends and family know how untidy I am and I'm sure can picture the cloud of icing sugar!
My son and Great nephew helped the baking process by cleaning up!


Obviously mission 2 was the tidy up phase ...... Mmm, not keen on that bit.  However, a couple of hours of elbow greases and the place was spic and span.

Next came the decorating. Bunting, balloons and table decorations were put up to make a festive atmosphere. My lovely daughter decorated the donation boxes and arranged the raffle prizes.
The cakes and coffee were set out as attractively as possible and I used some cute chinese dishes as sugar bowls which my lovely husband gave to me on our first anniversary.
Finally the craft stalls were assembled.

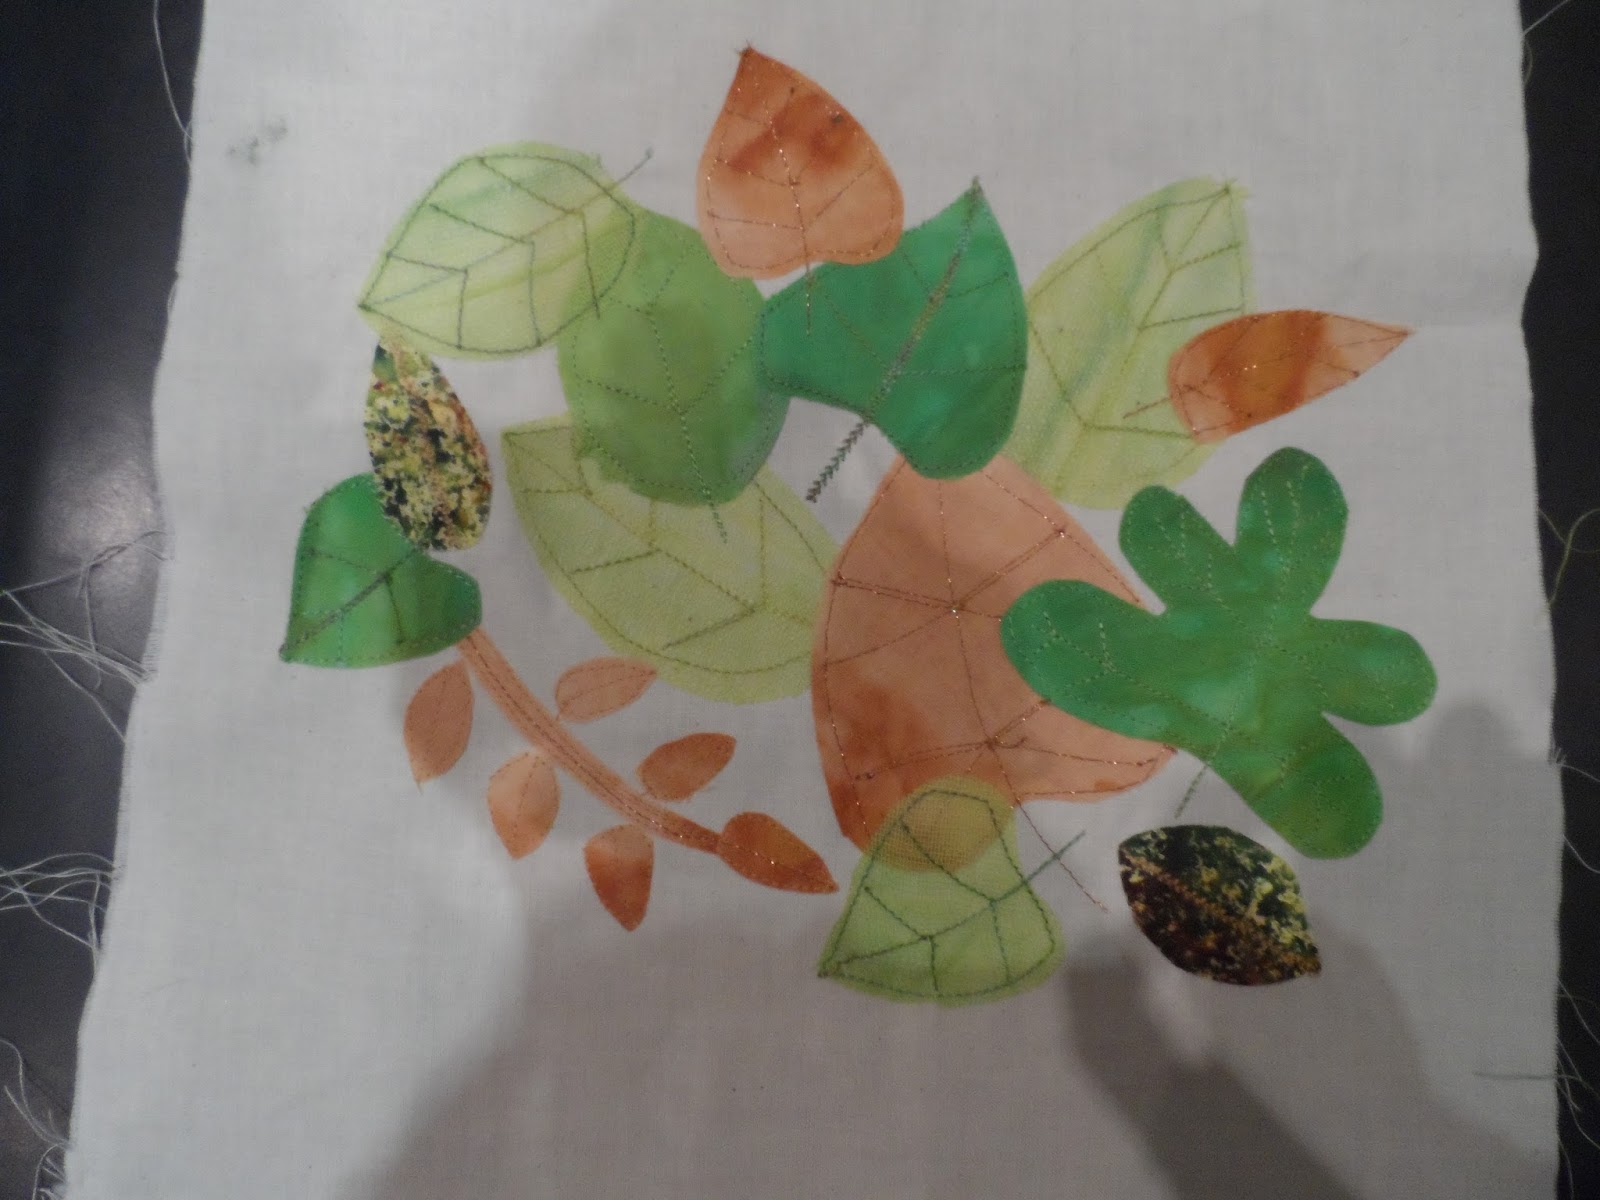
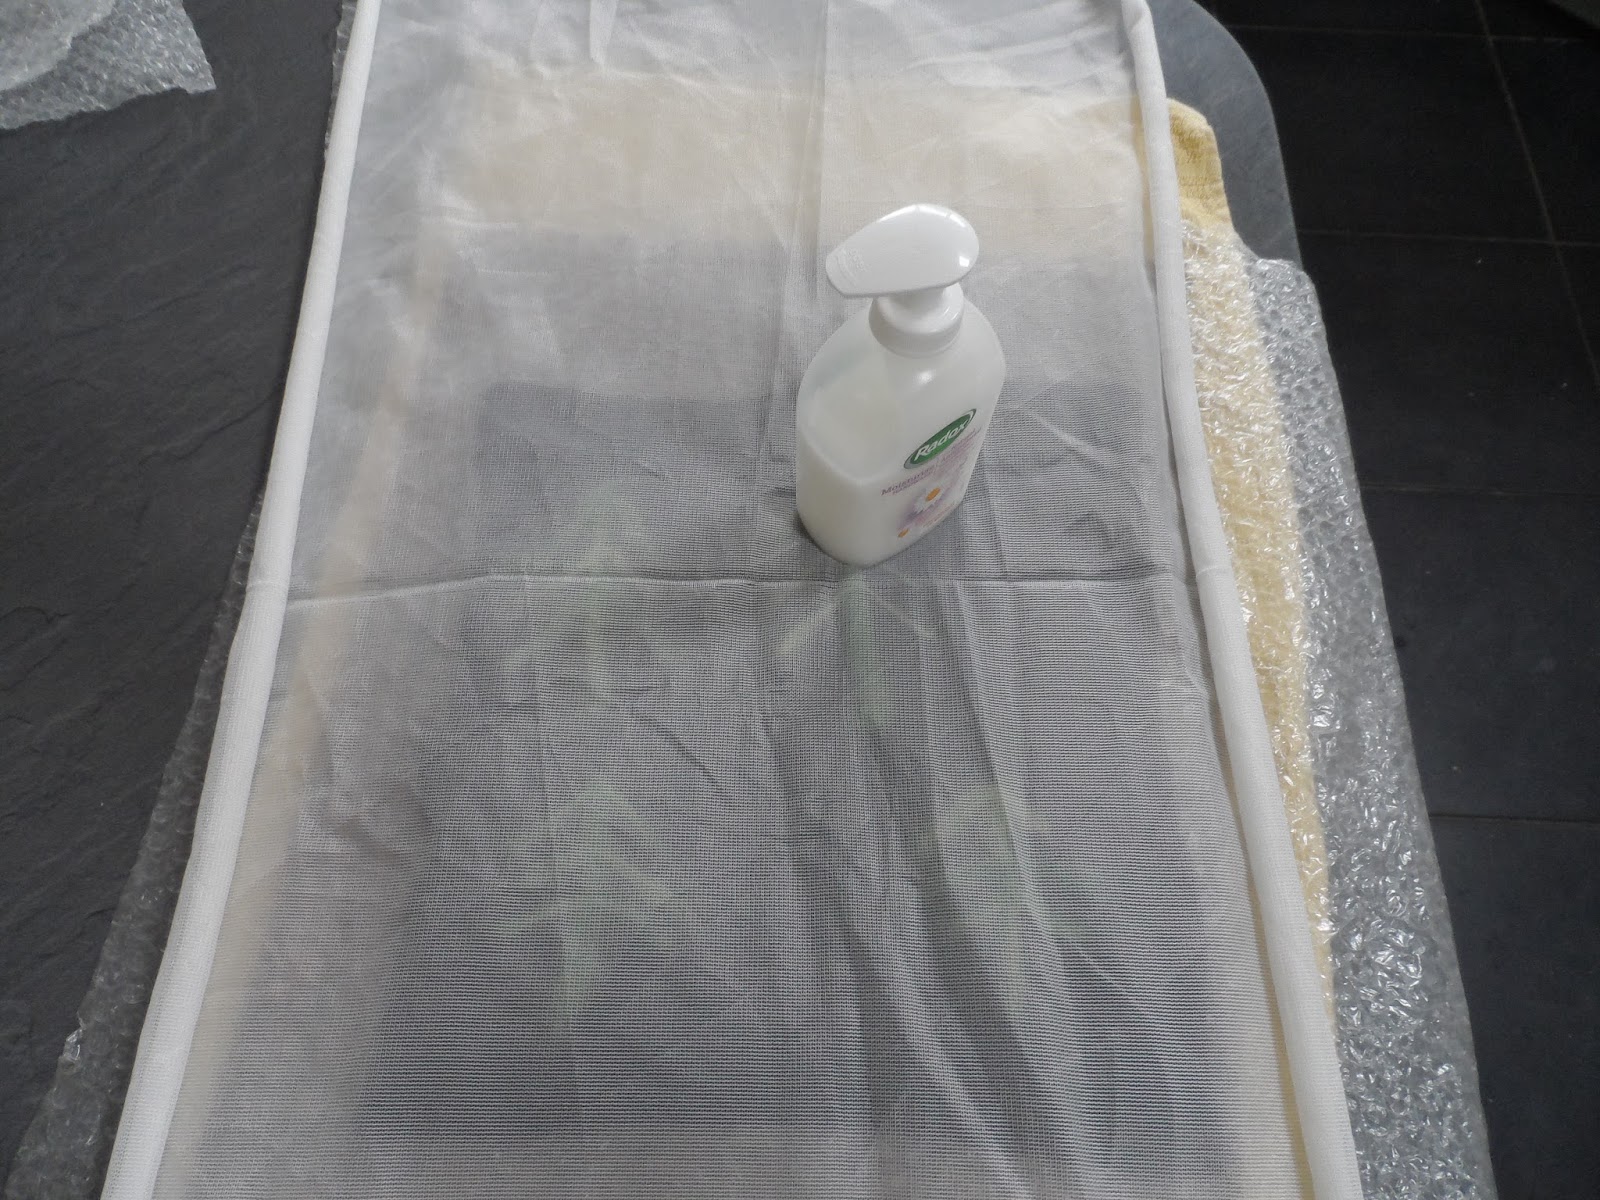
 These have been created by my friend who writes the Blog Sew stitch knit. 
Have a look and see what she is up to with her latest experimentation with soluble fabrics.                                         


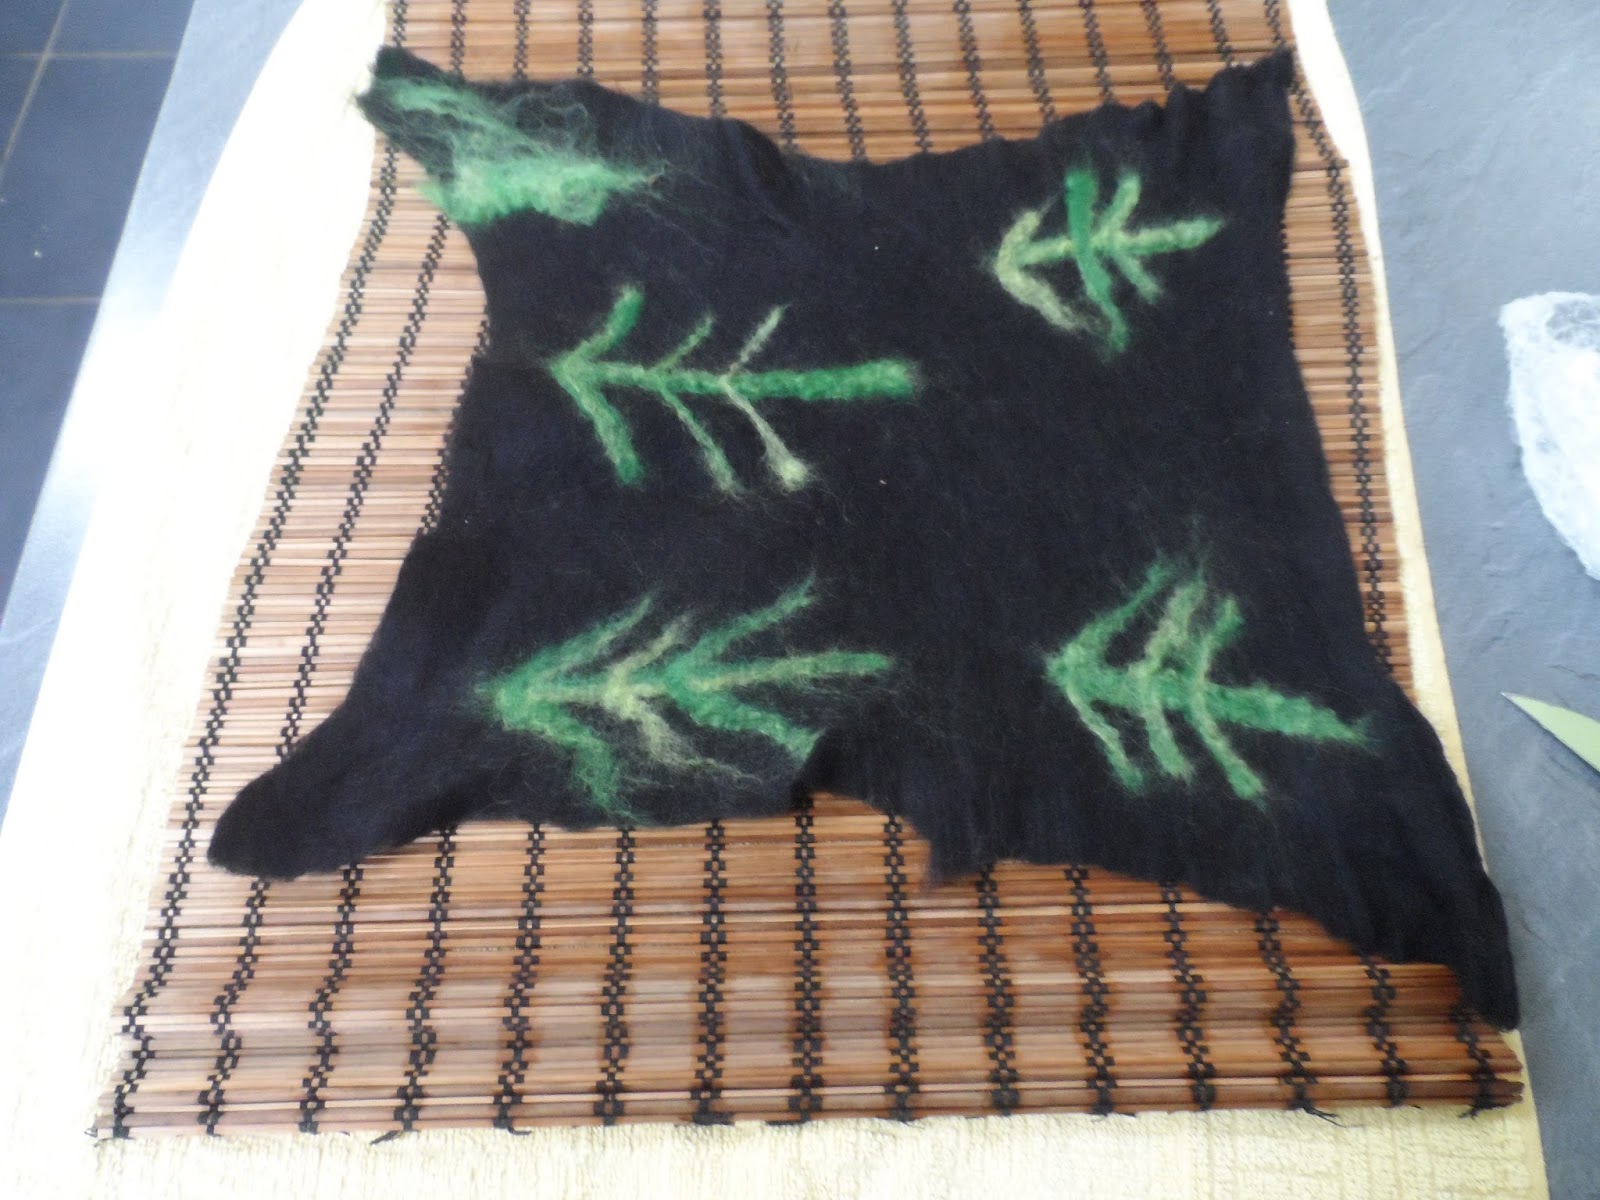
These are a sample of the things I make. I was really lucky to collect a number of orders during the coffee morning.


As you can tell!

In total we raise £320 pound for Macmillan 
Thank yo to all of my lovely family and friends who participated and made this event such a great success. If anyone else needs to walk off the cake I'll see you at Fairhaven Lake!


Wednesday 25 September 2013

Ta da!

Where has the last week gone? I've been so busy visiting family and friends; applying for a job and shock of all shocks .... running with a lovely group of ladies.
In between all of that fun and frivolity there has been just enough time to complete my Artisan Apron created by adapting a pattern designed by Janet Clare. 

I'll show you the pictures.
Laying out the pattern and cutting the fabric.
After piecing everything together and sewing it I had to turn the whole apron through a vary small hole.
 This required patience and holding my breath as I felt certain I would her the stitches rip at any moment.
The next part of my learning journey involved using a twin needle to decorate the edges of the apron. 
Sadly the picture is not good enough for you to see it here. Using a scrap of fabric to test how to use it was a life saver as I decided that I'd need the same thread through each needle and in the spool.


I wonder if |I'll wear it with the plain side showing or the patterned? Which do you prefer?


Friday 20 September 2013

Artisan Apron

This week has been a really busy one. First of all I have made a photo album as a gift for a 40th birthday.  I had a wander down memory lane and a brilliant time arranging photographs and conjuring up captions.

As for sewing .... well  I've started making an Artisan apron with my friend who writes the Sew stitch knit blog.
 I have never attempted to make anything wearable before so I have needed some help with this process.
The pattern has been designed by Janet Clare who we met at the NEC back in August. She's a very talented lady!
My friend adapted the pattern to fit me as I'm significantly taller and rounder than the person the pattern was intended to suit.  After much deliberation and giggles the cutting process has begun. It's no secret that I was nervous to start with.  
I'm now at the point where I have cut out 2 versions of the apron as it will be reversible one completed.
The pockets have been made and stitched in place, the side seams have been stitched and ironed flat.  The final part if toe sew both pieces together .... and I'm waiting for my pal to come back from London to help me on my way ... yes I'm a real chicken, but I just want it to be perfect.
Once it's completed I'll add the pictures. I adore the fabric I have bought as it's colourful and vibrant. If I'm going to wear it to work in I need something cheerful during the gloomy winter months.
I was so delighted when my Mum said she might like one for Christmas. (She obviously has faith that it will work out in the end.)  As she's a very talented gardener and flower arranger I feel I have already for the inspiration the appropriate fabric. 

Sunday 15 September 2013

Inspiration

This weekend I've been to the lakes with my lovely friend to seek out some artful inspiration.
The views alone are enough to inspire me.
We picked up the guide for the Cumbria Arts trail and set off.
                                             It began on 14th spetember and is on for 2 weeks.

This studio is in the grounds of Greta House Hall in Keswick and had the work of Oli Robson, Sara-le-gris, Julia Wilmott and Tonia  Gilliatt.
My photo does not do justice to them at all so please click on the link below for a much better view.
on display. 
Having looked through the guide we decided to call in and see Kate Durdy in the Eden Valley.
I loved the colourful style and it also compliments the name pictures that I have made using mixed media.  I will use be more adventurous now that I've seen her colourfulness.

 Fiona Starr's work was on display in a gallery in Keswick and to be quite honest it is truly stunning. This is not the picture on display, but one I found on the internet to give a flavour of her style. If I'd had a spare £850 I'd have her work hanging in my dining area right now! 

The end result of a fantastic weekend is one inspired lady. I can't wait to get the house to myself and begin making yet another mess! Watch this space for the results.

Tuesday 10 September 2013

A flurry of leaves

I love the shapes and colours of the leaves that I have cut out and stuck on to the fabric with bondaweb. However, I feel that the whole thing lacks definition and depth.

So I visited a Hobbysew in Penrith at the weekend and bought a selection of moon threads and Gutterman variegated threads with this project in mind.
 These are the same pieces of fabric, the lighting has made them appear to change colour!
I stitched around the shiny oak leaf first using a normal machine stitch, but didn't like the result as it was not bold enough. So, the whole piece has been stitched using satin stitch and a host of different threads. I feel that the leave stand out more.
I think I will turn this in to a panel on a cushion. I just need to find the right background.

If you want to see some really inspirational textile work have a look at my friend's blog www.sewstitchknit.com.

Sunday 8 September 2013

Leaves version 2

I couldn't stop thinking about my leaf work whilst I was listening to the rain fall on the caravan roof over the weekend.  I decided to have another go and use some different techniques.


I have looked a the work of a number of textile artists and like the idea of using HOT Textiles. 
These are demonstrated beautifully by Kim Thittitchai. 
 Go to www.colouricious.com/blog/tag/kim-thittitchai

                                                                                                                                                                                                                                                                                                                        I bought the hotspots when I went to the NEC in August and have been waiting to use it.

I also bought the foils.


I drew a leaf shape on the paper side of the hot spots, then cut it out. I laid the glue side on to my fabric and covered it with some baking parchment. 
 Baking parchment is vita if you ever want to use your iron for your household laundry again! 
 Once the hotspots had adhered to the fabric I placed the foil on to them - coloured side facing up, covered it with the baking parchmentand applied the heat again.
 Slowly and carefully I peeled the foil and left behind a pretty leaf shape of foil dots. The remaining sheet of foil can be stored for later use.

Additional leaf shapes were then added. Some have wadding behind them to give depth, others are cut from scrim, calico and dyed cotton.
Tomorrow I will add some sew details to my creation.  

Thursday 5 September 2013

Leaves

I love natural things especially leaves and plants so its hardly surprising that I decided to use the space dyed fabric to make a leaf picture.

I rummaged through my stash and found some fabric that I have rusted earlier this summer and some fabric that I'd sprayed with procion dye.

After ironing on paper backed bondaweb I cut out some vague leaf shapes.
I ironed the shapes in place and decided that some stitching would make all the difference.


I used a variety of threads, some metallic,  Gutterman's greens and mustard yellow Moon thread. 
I'd like to expand my range of threads ..... but that's a secret from the budget keeper!

 I think that I might have another go using a different background colour and some darker threads. I might even do some detailed work by hand to make more of an impact with the stitches.

Wednesday 4 September 2013

Space Dye


I've been Space dyeing fabric today.

I have used pieces of calico, scrim and a linen mix. I know from previous experience that I will get a range of toning colours to use in my projects.

The fabrics needed to be washes and soaked before I started to do anything else.

Procion dye.
Make sure you wear gloves when using this!

I mixed the procion dye in a tablespoon of hot tap water. I began with the yellow and added differing amounts of blue to be sure that a variety of green shades would be made.
In a different container I dissolved the salt. Then I combined the salt and dye mixtures.


The fabrics were scrunched and laid in a shallow container and the different batches of dye were poured over the fabrics and left to soak for a couple of hours.

To fix the dye you need to add soda ash which you can buy online. However, washing soda mixed in water works perfectly well too and is readily available in the supermarket ... and really cheap.


Finally the fabric needs to be rinsed until there is no longer any dye seeping from it. I tend to wash it by hand but there's no reason why it couldn't be put into the washing machine.
Now I just need to wait for the fabric to dry and I can use it.
I have thoughts of leaves in my head ... so watch this space and see what happens when I add some thoughtful threads!

Wet felting ... with a helping hand

My lovely nieces  arrived this morning and the first words I heard were "What are we doing today?"
Their favourite friend (my teenage daughter) was still getting her beauty sleep I knew we'd have plenty of time so we decided to have a go at creating wet felt in preparation for making Christmas cards at a later date. 


I selected a piece of 100% wool  Prefelt and we used the needle felting equipment to add some Christmas tree shapes.
 I bought the Prefelt from Art Van Go at the Creative Threads Textile show at the NEC last month.
www.artvango.co.uk  01438 814946


Then we laid out a towel, bubble wrap, bamboo mat and put the felt on top. This was covered with some netting and hand soap and water were added.

Then it was time for some elbow grease!
The felt and fleece had to be rubbed using the bubble wrap for 15 minutes.  By the end our hands we squeaky clean and smelled lovely.

When I looked for instructions to make wet felt there were all sorts of suggestions about the type of soap that should be used e.g. soap flakes, Olive oil soap etc.  To be honest ... anything will do!

15 minutes can feel like a lifetime, but with a little help from my friend the time simply flew.
So we rinsed out felt.


 First boiling water was used,  followed by cold running tap water.


We repeated this process 3 times until the suds had 
all gone.


Then we laid the felt out on the bamboo mat.


Rolled it up.


 Rolled it forwards and backwards 20 times, then opened it up and turned the felt 90 degrees on the mat and repeated the rolling process.
We did this another 3 times.
Finally we hung the felt to dry and we will use it to create something lovely at a later date.

Christening gift .. .Peppa Pig Cushion

I've been making bits and bobs for the past few months and my lovely friend Irene has encouraged me to join her and sell then at some local craft fairs.  There's one at the Solaris in Blackpool on the second Sunday of each month.
The next one I'm attending is on Sunday 13th October.


Tooth Fairy Pillows

The tooth fairy cushions have been really popular so far and I have really enjoyed making them. The inspiration came from memories of rooting beneath my children's pillows hunting for their tiny tooth whilst trying my hardest not to wake them up.

I've been asked to make a Christening gift for a friend.


Border created with programmed stitches on the Janome 5000Q machine.
I  started with a lovely piece of linen, which I've embellished with a star stitch which is programmed into my machine.


Then I've cut letters out of fabric which has bondaweb on the back. I've ironed them on and then stitched them firmly in place.


The tricky bit was making Peppa Pig. I'm better with abstract designs!


Finally I have put the whole thing together.


I have really enjoyed myself and I feel as if a special little girl with have a gift made by Thoughtful Threads.